Manual
Login
Our 3D CAD supplier models have been moved to 3Dfindit.com, the new visual search engine for 3D CAD, CAE & BIM models.
You can log in there with your existing account of this site.
The content remains free of charge.

Top Links
Manual
 |
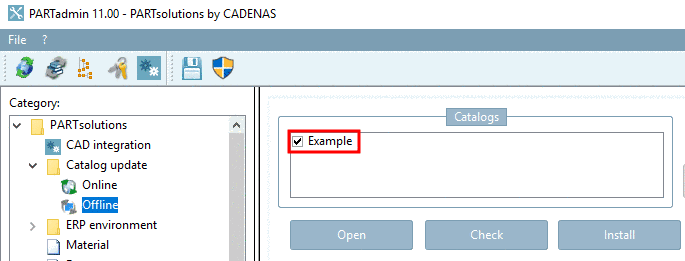
In order to make catalogs available for download from the Internet, for example, these can be cipped, in other words reduced in data size. The conditions needed to be fulfilled can be entered in the CIP catalog window.
On the left side of the window you can see a Catalogs column. There you will find all previously cipped catalogs.
All checked directories are cipped by clicking on the button.

-
You have different selection possibilities available to you in the list field.
-
When clicking on the browse button the Update (see fig.) dialog box opens. Here you can set a date filter so that only files Newer than are gathered. Concerning the Archive bit active option, please contact CADENAS Support.
-
Classifications may also be cipped.
When cipping class systems, the settings in Project selection are insignificant.
In this case, the CIP catalog dialog should be opened via the Extras menu and the entry should be added manually in the Catalogs area on the left.
In the Classification field, the name of the classification must be entered exactly the same as in the
classsystem.cfgclassification file. Please make sure that upper and lower case letters are correct.As with catalogs, the full-textual search index may be created. To do so, activate the option Create search index.
-
For this selection only the indicated files will be transferred to the cip file.
The files are specified in the Additional directories field (see further below).
-
The spelling entered here will later be displayed during the installation in PARTadmin or during installation of the DVD.
![[Note]](/community/externals/manuals/%24%7Bb2b:MANUALPATH/images/note.png)
Note If you do not enter a description, then the description given under Edit project -> General tabbed page -> Catalog name, or Name of installation will be used. The entry on the CIP catalog page has precedence.[29]
PSol-Version: Minimum version of PARTsolutions to install the cip file. When selecting "10.0" the file cannot be installed with V9.
Directory: the directory/catalog to be cipped (marked in directory tree)


License file: So that the project files belonging to a catalog cannot later be opened and exported in the PARTdataManager by unauthorized persons, each individual project is linked to a license ( for example, CNS2009*Folder1*READ or CNS2009*Folder1*EXPORT). All licenses that correspond to a catalog are stored in the so-called license file (ending *.cnsldb). This *.cnsldb - you can request one from CADENAS - should then be entered into this field.
-
Catalog license: In this field the basic license (for ex. CNS2009*Folder1) should be entered. You receive the basic or catalog license along with the *.cnsldb file.

![[Caution]](/community/externals/manuals/%24%7Bb2b:MANUALPATH/images/caution.png)
-
If the *.cip file to be created is to contain directories or files enter them here.
Additional directories may contain individual help files for example, which you have applied within the Edit project menu -> Catalog help tab. Input via $CADENAS...\...\....
See also under Content -> list selection field Files.
-
Catalog is free (no check of CNS2009*MAINTENANCE): For licensed catalogs, the so-called maintenance license is requested during the uncipping. If you do not have one, the catalog cannot be uncipped.
-
The encryption ensures against manipulation. The file contains a license key, for example.
-
Automatically adding external files
These may be located anywhere under $CADENAS_DATA (the respective linking is located in the project file).
-
If you select this option, the index for the Full-text search will be created.
If you also want to create the GeoIndex (fingerprints for the geometric search), enter values into the fields Percentage and Absolute fraction. The default entry "-1" means that no GeoIndex will be set.
Sample calculation 1: 10 rows, Percentual fraction: 10, Absolute fraction: 3 -> 3 rows are created
Sample calculation 2: 10 rows, Percentual fraction: 20, Absolute fraction: 1 -> 2 rows are created
Thus the larger of the two values is always taken. The time for generation and the memory space for the fingerprints is approximately proportionate to the number of rows.
Tabbed page Test catalog (see Section 5.8.2.1.12, “ Test project / Test directory ”)
|
Note |
|---|---|
Before you can begin to make settings in the individual fields, the option Perform tests must first be activated. | |
Automatic Classification of standardized Parts
When a new
release CIP is generated via PARTproject, also a scanner is
running during this process in order to identify and classify all kind of
standardized parts. Explicitly all NNs and NTs are checked whether they
contain one of the below listed keywords followed by a number like “123”,
etc.: If this is the case, the project is automatically
assigned
in the Standards
classification of found Standard project's class. Projects of
this sort are marked with the Standards icon  in PARTdataManager.
DIN, ISO, ANSI B, NF E, VDI, UNI, NAS, NASM, BSI, ASNA, JIS, CSN, STN, GOST, JB/T, NIHS
EN, SN, LN, AN, SN, BS, IS, KS, GB, PN, GB, MS, VG
Especially within the 2-digit keywords there is unfortunately a high rate of mistakes and wrong classifications, because e.g. „Rohrbogen 90°“ is recognized as a en 90 (an "Euro Standard”). Wrong classifications like this can be sorted out by inserting a „NO“ into the respective field in PARTproject under tabbed page General -> menu item General -> Similar to standard parts (optional) and then regenerating the catalog. Classifications have to be checked from time to time regularly.
|
Note |
|---|---|
|
A manual entry of a Standard classification leads to the same result as the automatic search. The icon does not become visible at once. The field is read during the CIP generation when the catalog is published. In the course of this it will be checked whether the value fits into the Standards classification and if yes, the project is added in the Standards classification. When now installing the generated CIP, the icon is displayed. | |
When using an ERP integration, directories and projects can be colored based on certain rules in addition. Information on this can be found under Section 4.12.2, “ Create and configure roles ” in PARTsolutions / PARTcommunity4Enterprise - Administration Manual.
